How To Setup Wifi On Epson XP 200 And Printer Offline Sollutions
How To Setup Wifi On Epson XP 200 And Printer Offline Sollutions - It may be that you are experiencing wifi connection problems on Epson XP 200 printer, or epson xp 200 printer you can not print because the information given is "Printer Offline " we will discuss some ways to solve the problem Epson XP 200 wifi setup and how to solve the epson offline printer. Read the instructions below:
Guide Epson XP 200 Wifi Setup:
- You can have a wireless router or access point that supports WiFi Protected Setup (WPS).
- Your router will display the WPS logo if it has this feature.
- Note: WPS usually does not work with the Airport Extreme Mac routers.
- To connect your printer to the router please press the WPS button on your router.
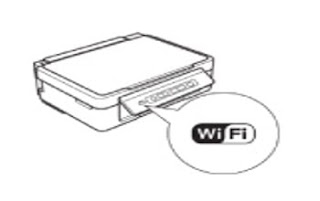
- Then press the WiFi button on your printer for 3 seconds.
- Wait until the wifi connection light is on.
- After 1 minute the printer's WiFi connection light should be on.
- If after 1 Minute light of the wifi connection is not lit, Please repeat the step from First.
How to troubleshoot an Offline Printer when trying to print in Windows:
For Windows 8:
Click the Start Button, Select Control Panel => Hardware and Sound => Devices and Printers. 2. Right-click your printer icon, click See what's printing, and select Printer, then select Use Printer Offline.
For Windows 7:
Click Start, then choose Devices and Printers => Double click on printer icon => click See what is printed => then Select Printer, Then select Use Printer Offline.
For Windows Vista:
Click Start and select Control Panel (or point the mouse cursor to Settings and then choose Control Panel), then Select Printer (in Hardware and Sound) or Printers. Right-click on your printer icon, then select Use Printer Online.
For Windows XP:
Click Start => Select Control Panel, Then Select Printers and Other Hardware then click => Printers and Fax. Right-click on the printer icon, then select Use Printer Online.
For Mac OS X:
Open the menu and choose System Preferences => Print and Fax or Print and Scan. Select the printer you use, then click the - (minus) sign to remove the printer, Then Click +, Select printer and click Add to add printer back to the printer queue.
If the above steps have not given souls, check the solutions below for your connection type:
- Check the error of the product you are using. If there are errors, see the product User Guide for instructions on how to fix the error.
- Make sure you select the correct printer when printing the document. If there are multiple copies of the same printer driver, remove the printer driver that you no longer use.
- Make sure the USB cable is properly installed and recommended USB cable no more than 2 meters.
- Note: Do not use a device that extends the USB cable, as this may cause signal interference from your printer. If you are using a USB hub with a printer, connect the printer directly to the computer. Do not connect via USB keyboard.

